What is SubDomain?
A subdomain is a subset of a larger domain. It allows you to create separate sections or divisions within your main website. Subdomains are created by adding a prefix to your main domain name and separating it with a dot (e.g., subdomain.example.com).
Subdomains are useful for various reasons:
- Organizational Structure: Subdomains can be used to organize different sections or departments of a website. For example, a company may have a subdomain for its blog (blog.example.com) or its online store (store.example.com).
- Content Management: Subdomains can be used to host different types of content. For instance, you can have a subdomain for images (images.example.com) or videos (videos.example.com).
- Multilingual Websites: Subdomains can be employed to create versions of your website in different languages. For instance, you can have a subdomain for the English version (en.example.com) and another for the Spanish version (es.example.com).
To create a subdomain in cPanel when using Cloudflare, you can follow these steps:
- Log in to your cPanel account.
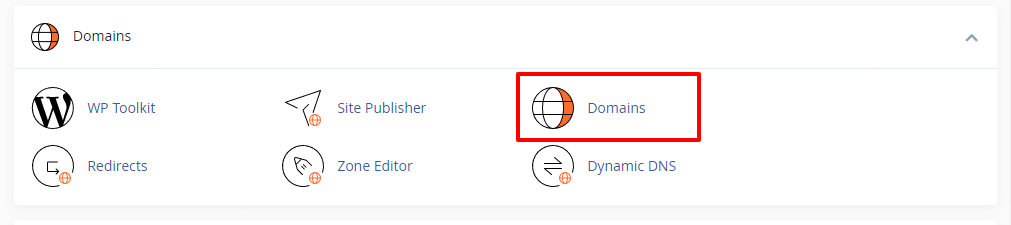
- Scroll down to the “Domains” section and click on “domains.”
- In the “Domains” section, you need to click on “Create a New Domain” button and enter the name of the subdomain you want to create in the “Domain” field (“sub.domain.com”).
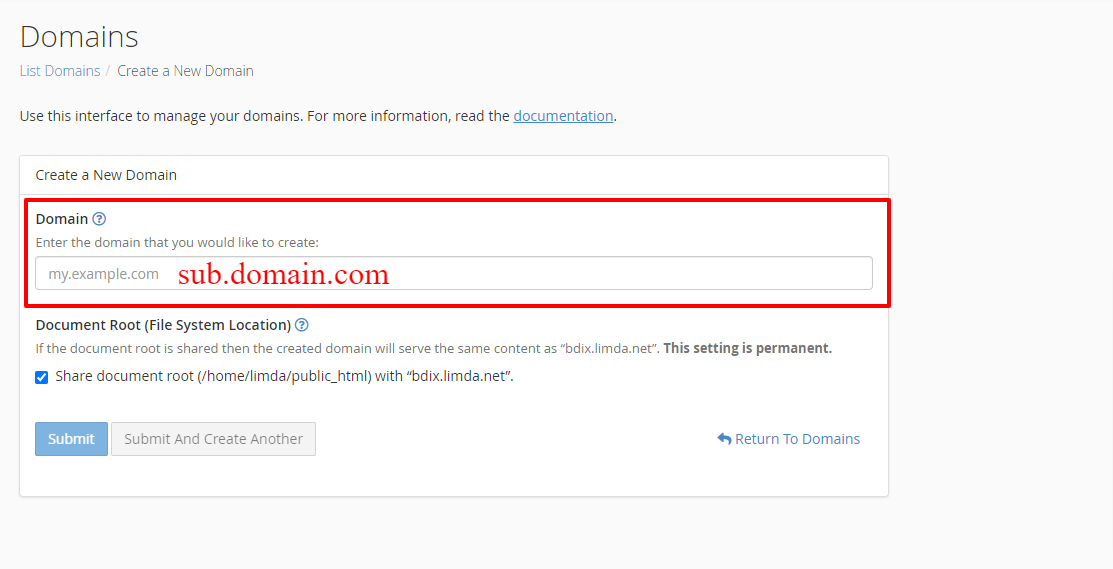
- In the “Document Root” field, cPanel will automatically fill in the location where the files for your subdomain will be stored in public_html. You can uncheck it if necessary.
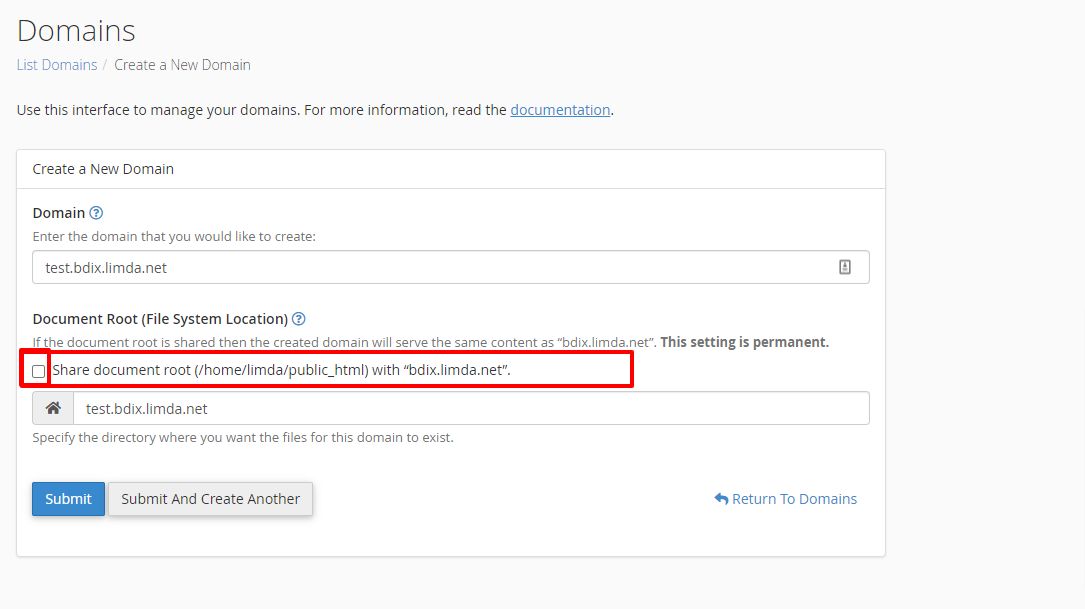
- Click “Submit” to create your subdomain.
Once the subdomain is created in cPanel, you need to configure it in Cloudflare to ensure proper DNS resolution.
Follow these steps to set up the subdomain in Cloudflare:
- Log in to your Cloudflare account.
- Select the domain associated with the subdomain from the list of websites.
- Navigate to the “DNS” section.
- Click on the “Add Record” button to create a new DNS record.
- Choose the record type, which is typically “A” for a subdomain.
- In the “Name” field, enter the desired subdomain prefix (e.g., “blog”).
- In the “IPv4 Address” field, enter the IP address of your hosting server.
- Click on the “Save” button to save the DNS record.
After completing these steps, your subdomain should be successfully created and configured in both cPanel and Cloudflare. It may take some time for the DNS changes to propagate across the internet. Once propagated, you can access your subdomain by entering its URL in a web browser.