Creating an email account on Plesk, a popular web hosting control panel, is a straightforward process. Here’s a step-by-step guide to help you set up an email account:
Step 1: Log in to Plesk
- Open your web browser and navigate to the Plesk login page. Typically, the URL would be something like
https://yourdomain.com:8443orhttps://yourserverip:8443. - Enter your username and password to log in to your Plesk control panel.
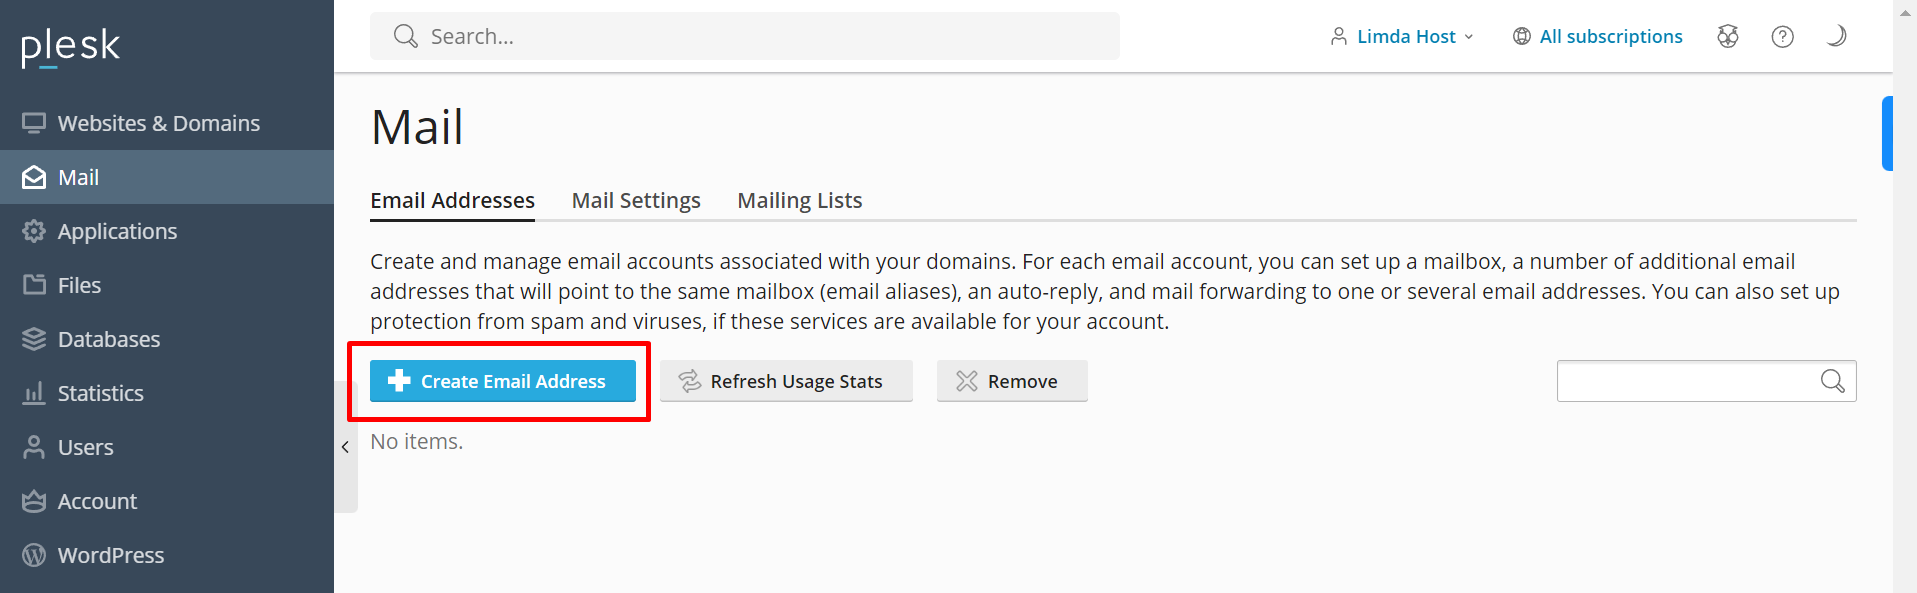
Step 2: Access the Mail tab
- After logging in, you will be on the Plesk dashboard. Look for and click on the “Mail” tab or “Mail Settings” option.
Step 3: Create a New Email Account
- In the Mail section, you should see an option to create a new email account. Click on it.
- Fill out the following information:
- Email address: Enter the desired email address (e.g., info@yourdomain.com).
- Password: Create a strong password for the email account.
- Mailbox size: Specify the mailbox size limit if needed.
- Send copy to: You can specify an alternative email address to receive copies of incoming emails if necessary.
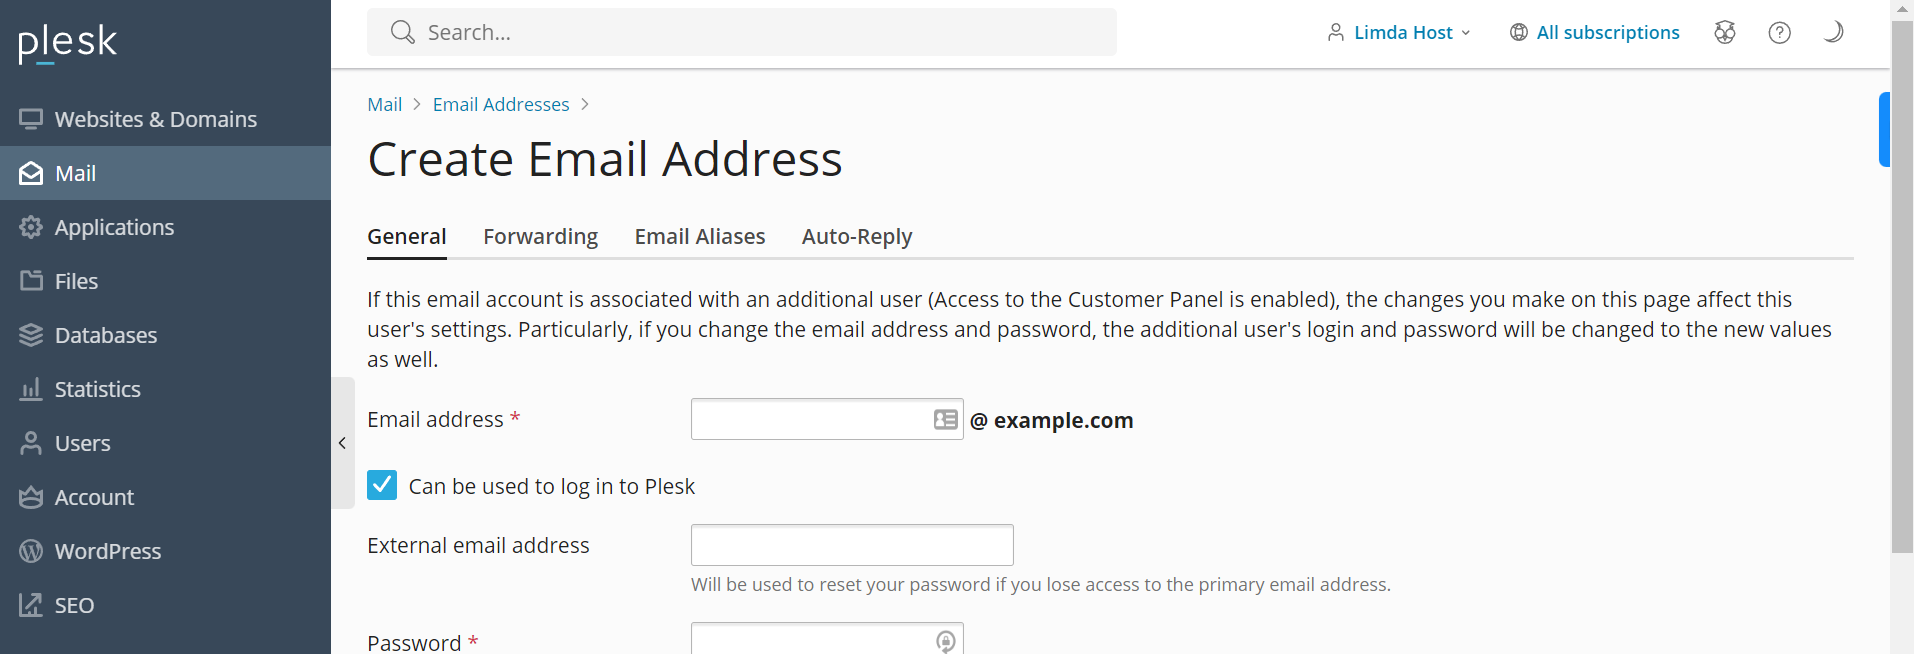
- Click the “OK” or “Create” button to create the email account.
Step 4: Configure Email Client (Optional)
If you want to use this email account with an email client like Outlook or Thunderbird, you’ll need to configure the client to connect to your server. You can find the necessary email settings (SMTP, IMAP/POP3, and server details) in the email account settings within Plesk.
Step 5: Test the Email Account
Once the email account is created, it’s a good idea to test it by sending and receiving emails to ensure that it’s working correctly.
That’s it! You’ve successfully created an email account on Plesk. You can repeat these steps to create additional email accounts as needed