Why you need to upgrade or downgrade your service?
Upgrading or downgrading a service is often necessary to align your resources and features with your changing requirements. The decision to upgrade or downgrade a service can be influenced by several factors:
1. Resource Needs: As your website or application grows, you might require more server resources such as CPU, RAM, and storage to accommodate increased traffic, data, or functionality.
2. Performance: Upgrading can lead to improved performance, faster load times, and better user experiences. Downgrading can help you save costs if you no longer need the current level of resources.
3. Changing Requirements: Your hosting needs can evolve over time. For example, you might initially require a shared hosting plan but later need the advanced capabilities of a VPS or dedicated server.
4. Business Growth: As your business expands, you might need more features, databases, or email accounts, making an upgrade essential.
To Upgrade or Downgrade any service, you need to follow the step:
Step 1: Log into Your Client Area:
- Open your preferred web browser and navigate to the Limda Host Client Area login page.
- Enter your login credentials (username and password) and click the “Login” button to access your account.

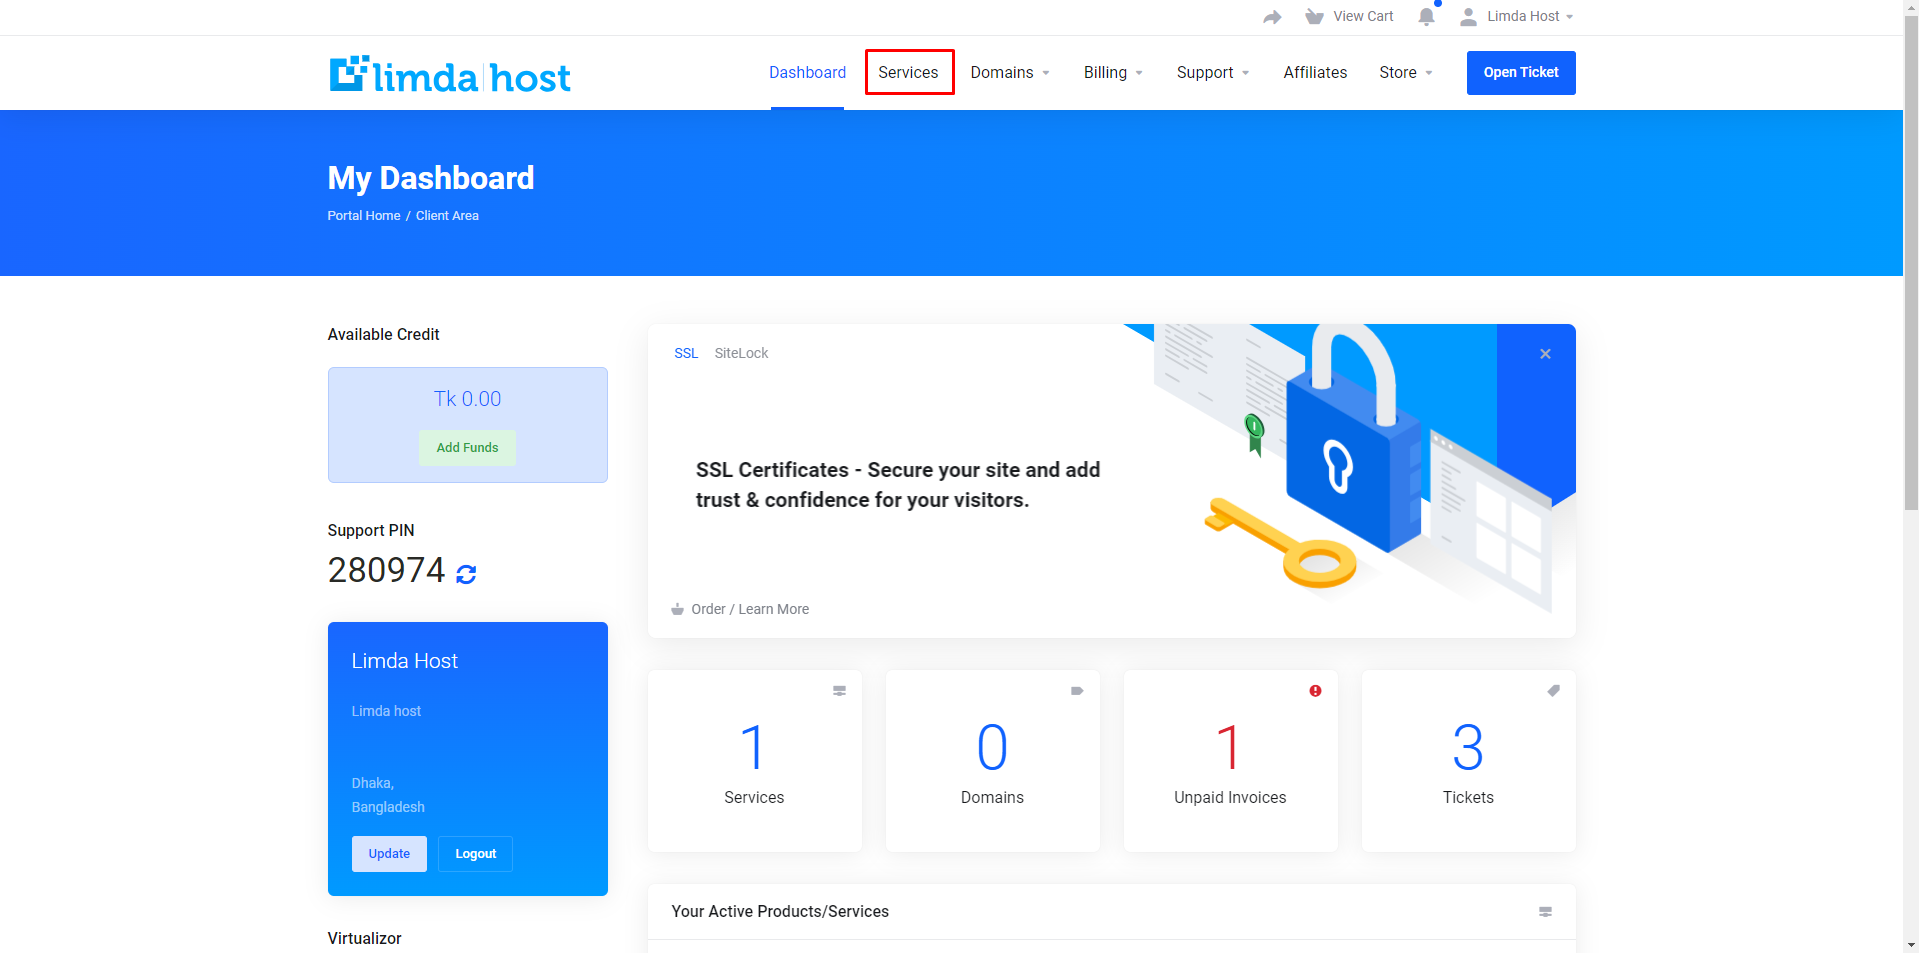
Step 2: Access Your Services:
- After logging in, you’ll be directed to your Client Area dashboard.
- Click on the “Services” tab. This will take you to a list of your active services.
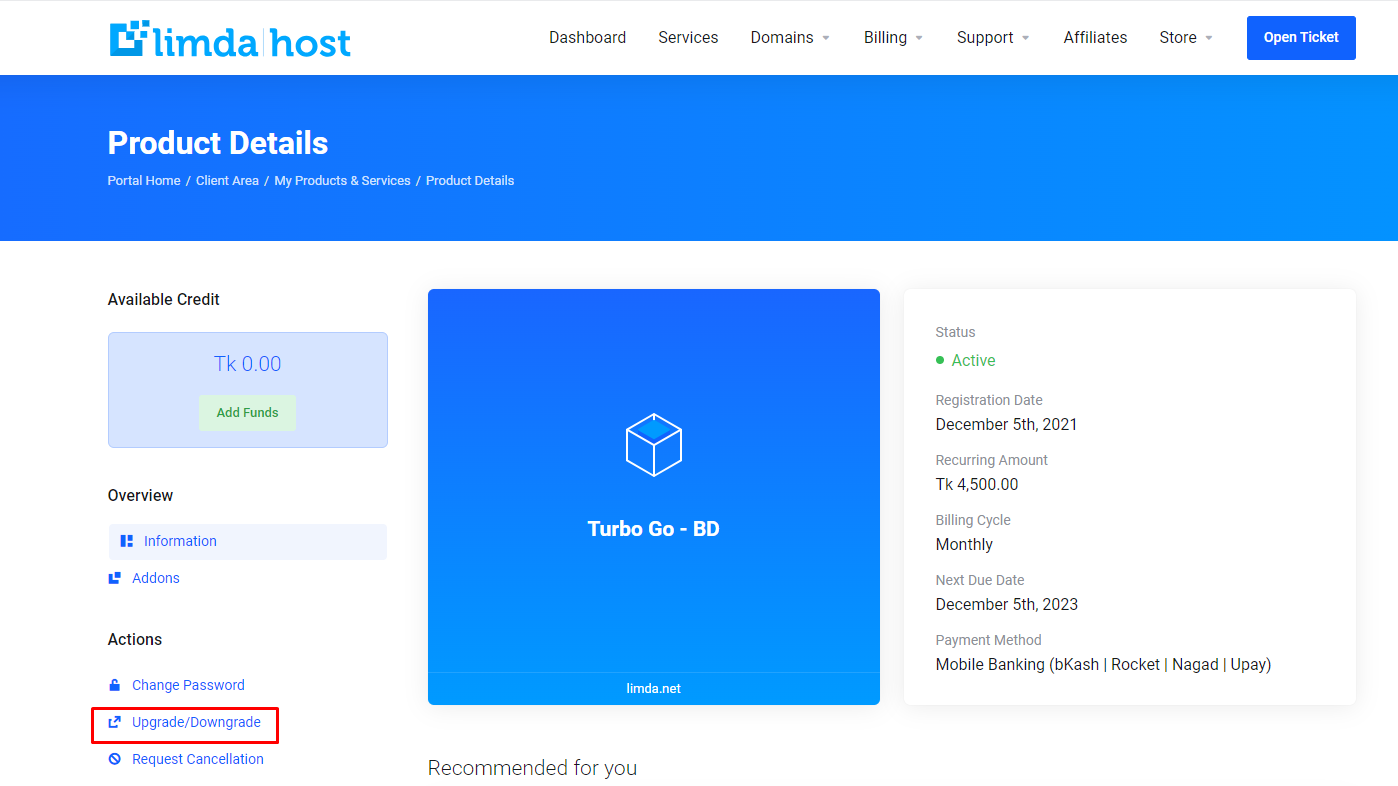
Step 3: Select the Service to Upgrade/Downgrade:
- Locate the service you wish to upgrade or downgrade from the list of active services.
- Click on the service name to access its details page.
Step 4: Choose Upgrade/Downgrade Option:
- On the service details page, look for options related to upgrading or downgrading.
- Click on the “Upgrade / Downgrade” button, depending on your desired action.
Step 5: Select New Plan:
- A list of available plans will be displayed. Review the plan details, including resource allocation and pricing.
- Choose the plan that meets your requirements for upgrading or downgrading.
- Click the “Select” or “Continue” button to proceed.
Step 6: Review and Confirm:
- Review the order summary that shows the changes you’re making, including the new plan details and any price adjustments.
- If you’re satisfied with the changes, click the “Continue” or “Confirm” button.
Step 7: Checkout:
- You’ll be directed to the checkout page. If there are any additional options or addons, you can review and select them here.
- Provide any necessary billing or payment information as required.
Step 8: Complete the Upgrade/Downgrade:
- After confirming your payment details, click the “Submit” button to initiate the upgrade or downgrade process.
- The system will process your request and update your service automatically.
Step 9: Confirmation and Changes:
- Once the upgrade or downgrade process is complete, you’ll receive a confirmation message or email.
- Access your service details page again to ensure that the changes have been applied correctly.