Limda Host provides a user-friendly interface through cPanel, making it simple to manage your files, including deleting unnecessary ones. Follow these steps to delete a file:
Step 1: Access cPanel
Open Your Web Browser: Launch your preferred web browser.
How to login cPanel: https://kb.limda.net/article/how-to-login-cpanel/
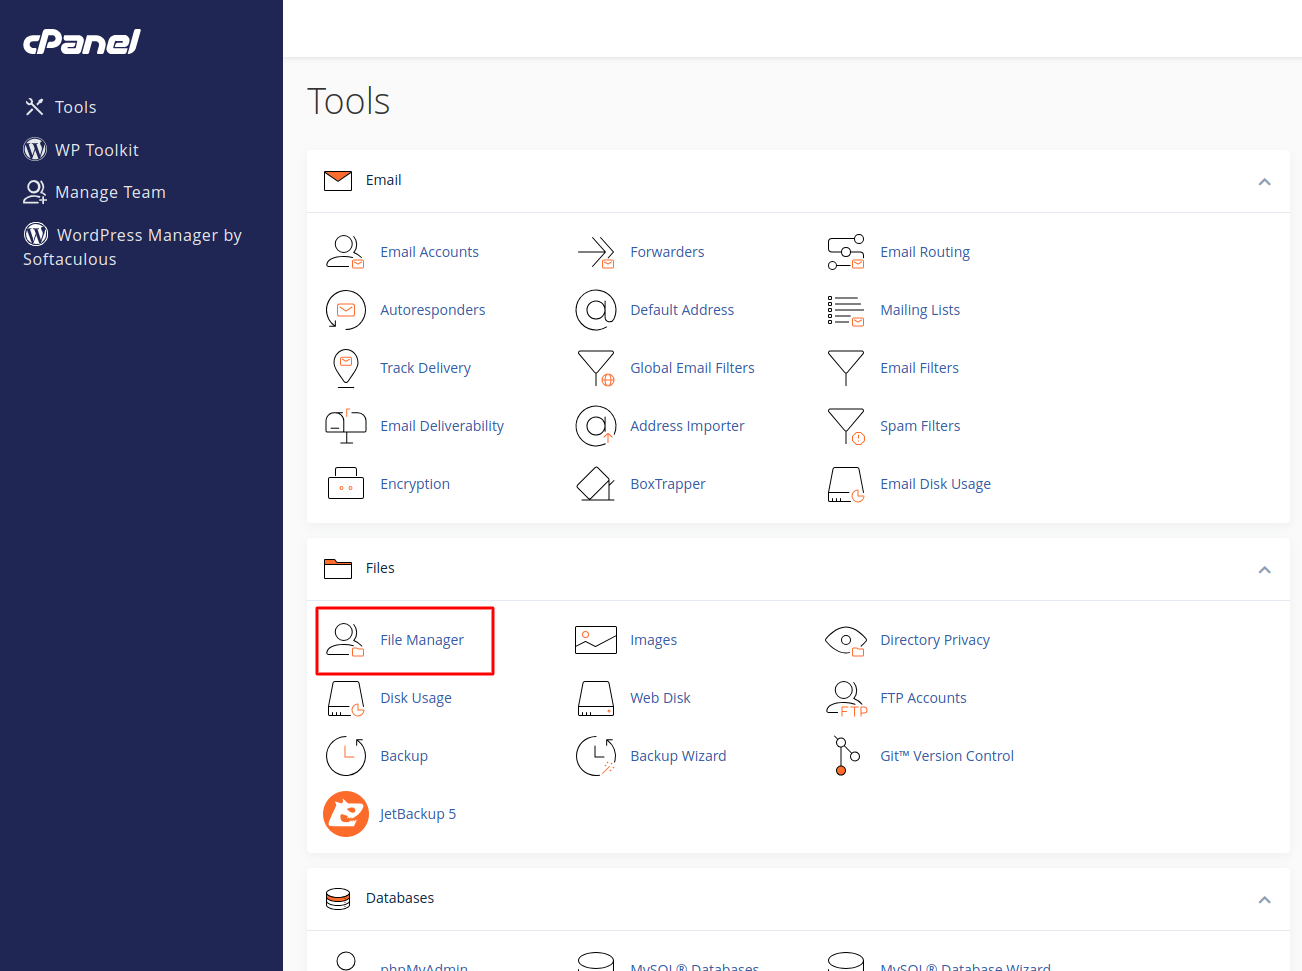
Step 2: Navigate to the File Manager
Find File Manager Icon: Look for the “File Manager” icon or link within the cPanel dashboard. It’s commonly under the “Files” section.
Click File Manager: Click on the “File Manager” icon to open the file management interface.
Step 4: Locate the File to Delete
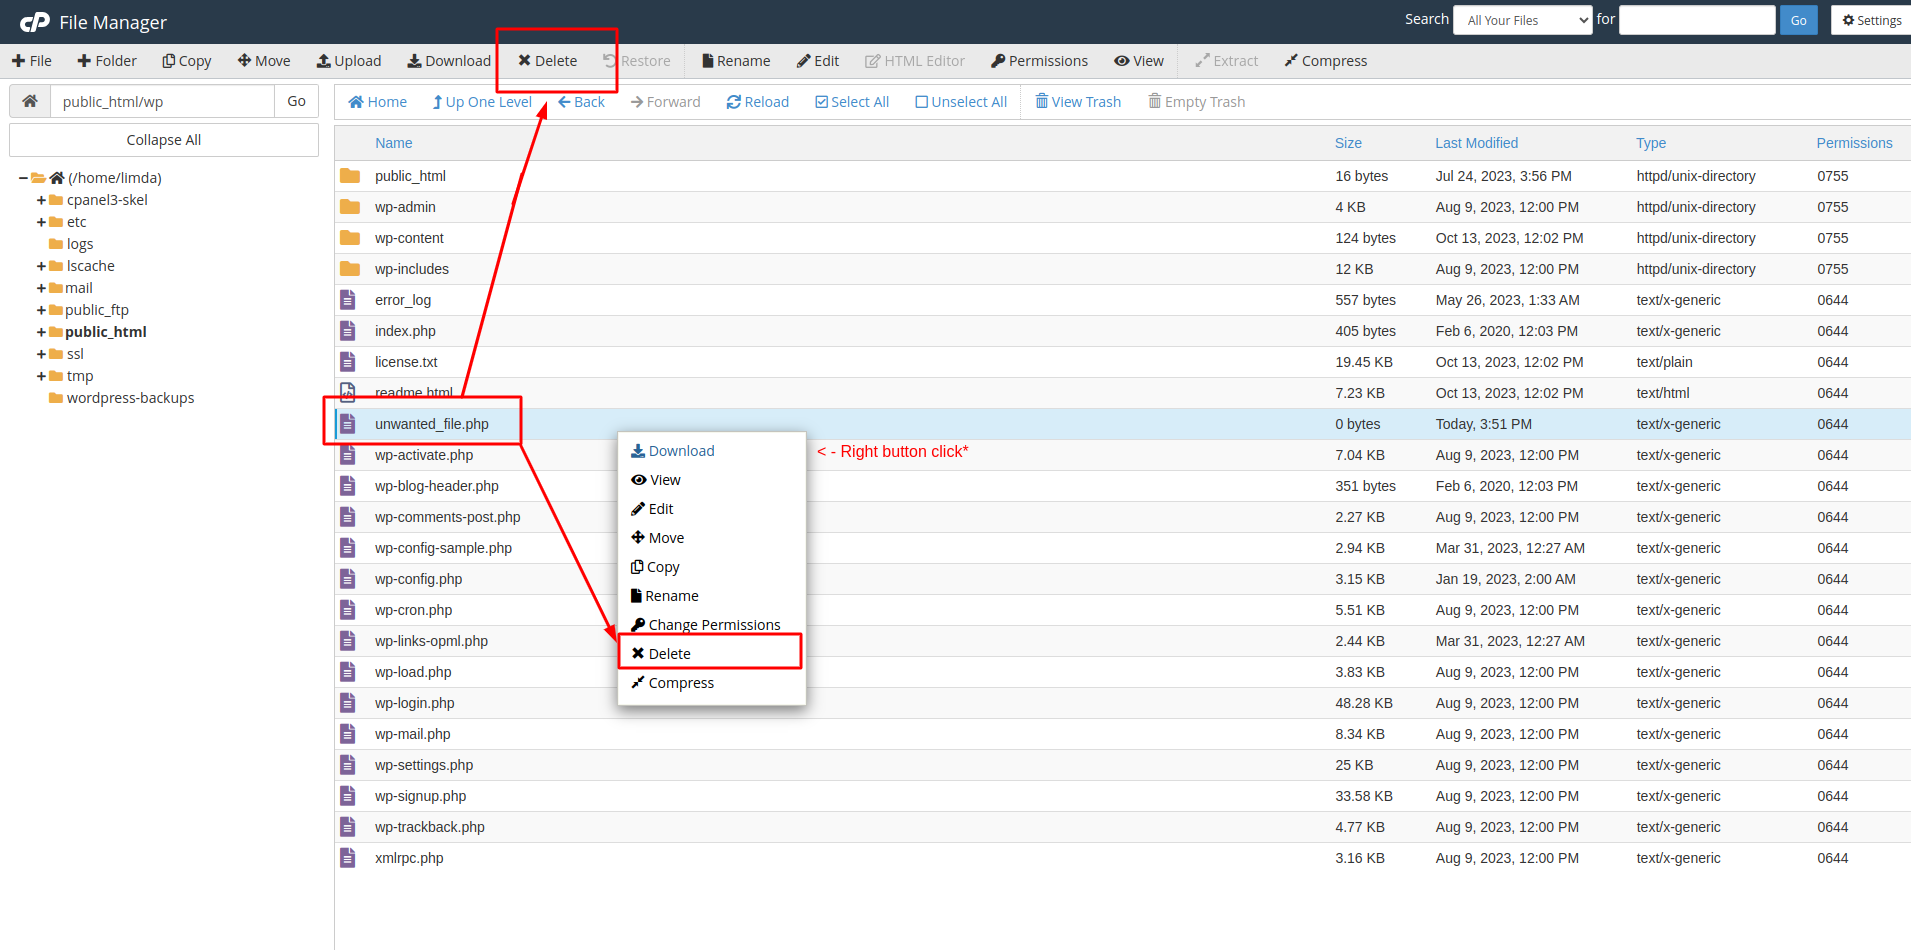
Browse Your Files: The File Manager will open, displaying a list of folders and files.
Navigate to File Location: Go to the directory where the file you want to delete is located by clicking through the folders in the file tree.
Step 5: Delete the File
Select the File: Once you’ve located the file, click on it to highlight it.
Delete Option: Look for the “Delete” button or right-click on the file to find the delete option.
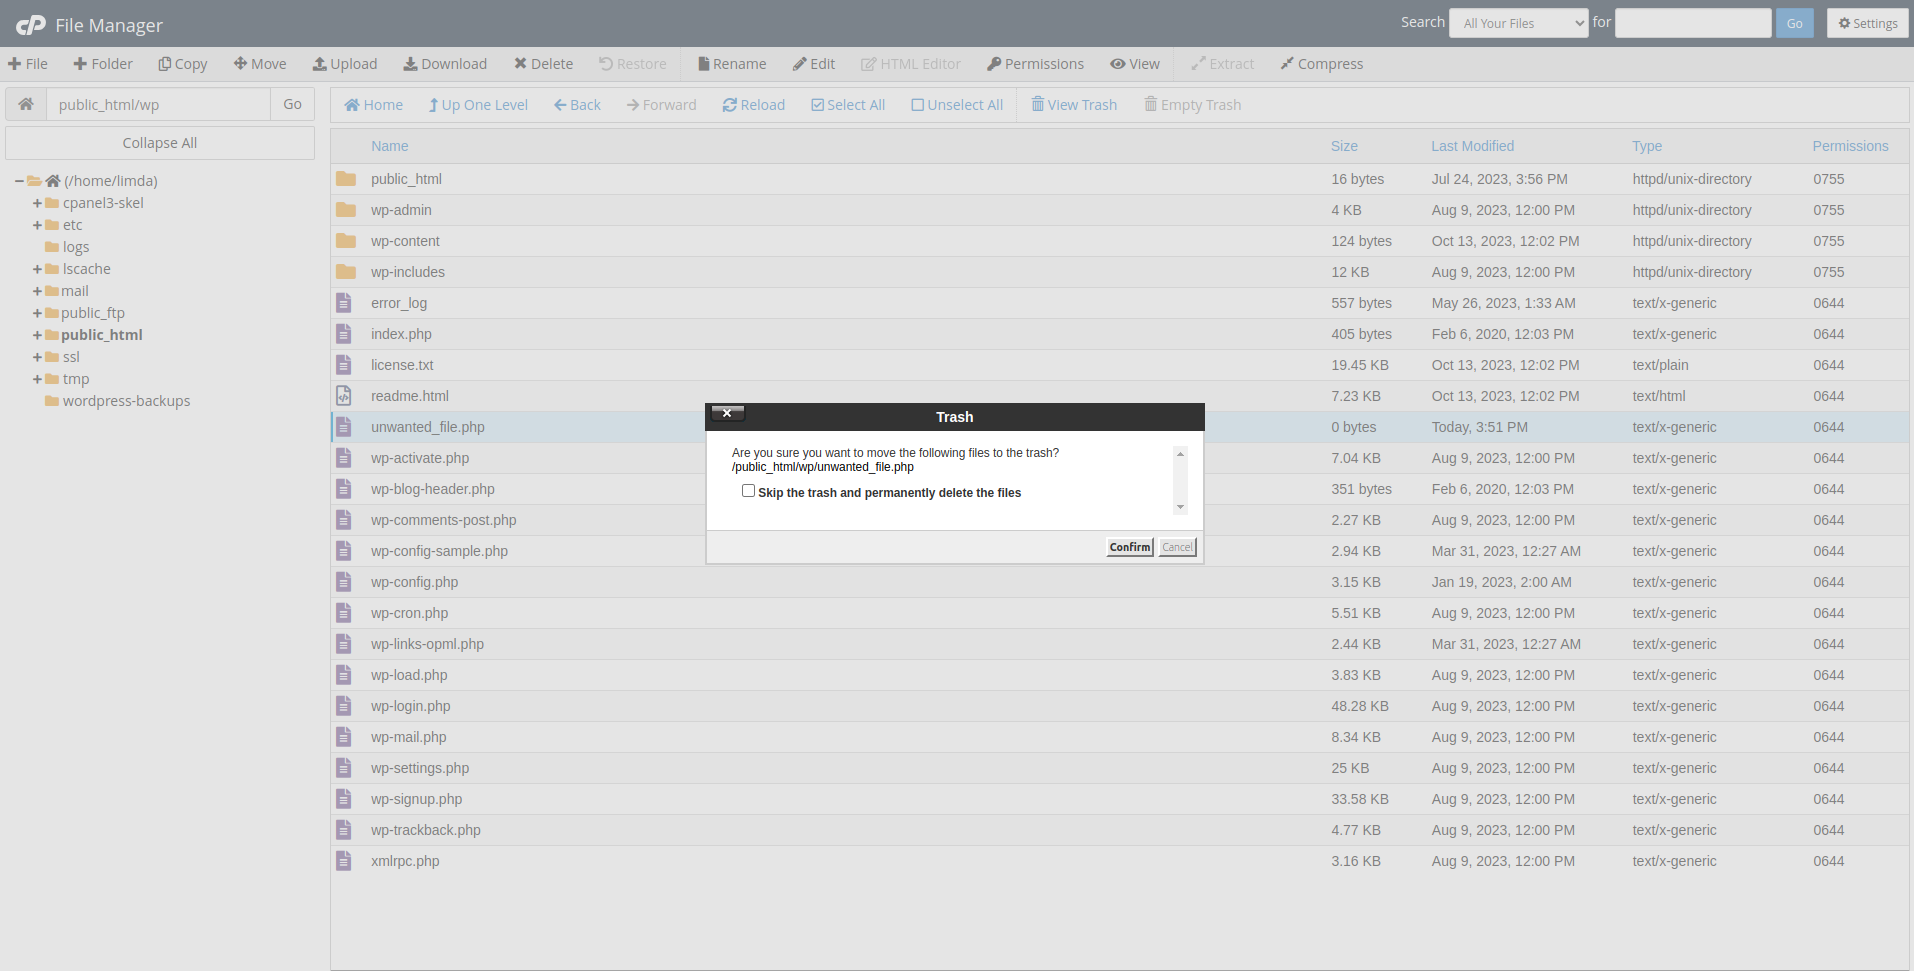
Step 6: Confirm File Deletion
Confirmation Pop-up: You might be asked to confirm the action. Ensure you are deleting the correct file.
Delete: Click on “Confirm” or “Delete” to remove the file permanently.
Step 7: Verify File Deletion
Check the Directory: Look through the directory again to verify that the file has been deleted. It should no longer appear in the file list.
Additional Tips:
Backup Important Files: Before deleting any file, ensure it’s not a critical file needed for your website. If uncertain, back up the file before deleting it.
Careful Deletion: Be cautious when deleting files as this action is usually irreversible.